Heatmaps
Heatmaps are a quick and easy way to gauge the effectiveness of your project's design. You can visually see how your users interact with your project and understand their behavior at a glance.
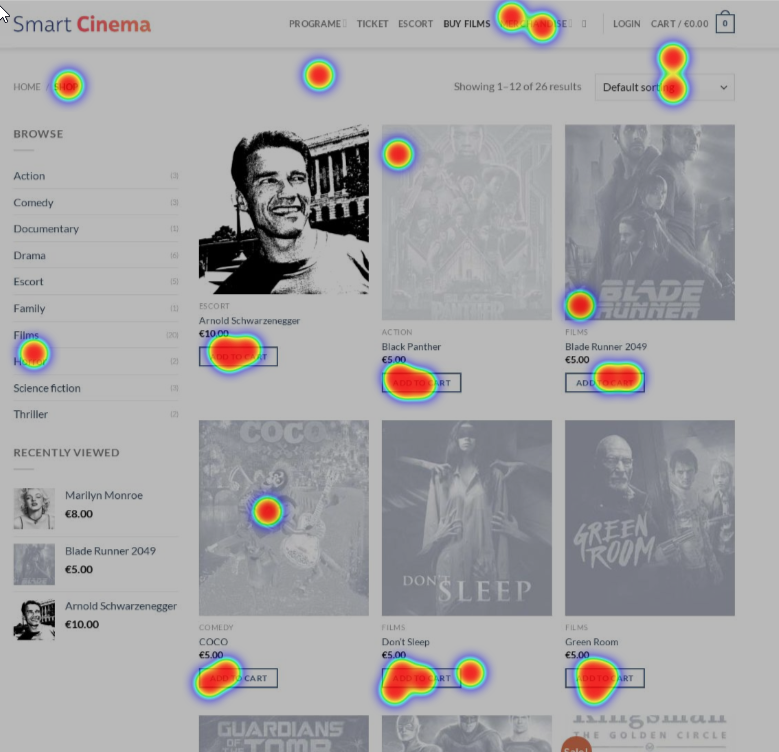
Smartlook builds heatmaps from aggregated data from multiple sessions across multiple users. The data is overlaid on a randomly selected screenshot of your project. You can view the heatmap once there have been at least ten sessions. The heatmap is updated with new data until the heatmap reaches the desired Heatmap precision. Heatmap precision is the amount of sessions you set while creating your heatmap. The higher the number of sessions, the more precise your heatmap will be.
Creating heatmaps
To create a heatmap:
- In the Heatmaps section, click + New heatmap.
- Enter the URL of the page you want to use for your heatmap.
- Select the type of match for your page.
- Enter a Heatmap name.
- In Heatmap precision, choose the amount of views you require to create the heatmap. The more views, the more precise your heatmap will be.
- Enable Use history data if you want Smartlook to use your project history to generate your heatmap sooner.
- Click Add filter to filter the data used to generate your heatmap.
- Click Create heatmap.
And that’s it! You can view your heatmap once it collects enough data.
Heatmap match types
When creating heatmaps, you need to choose what match type you want for your heatmap. Currently, there are three match types:
- Simple match
- Exact match
- Substring match
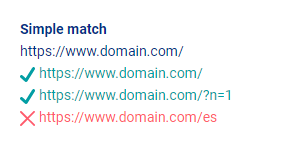
Simple match
Simple match is the default match type. You can use it to track a specific page. Any parameters beyond the URL are ignored meaning that the data in the heatmap will include any variation of the URL that contain additional parameters.
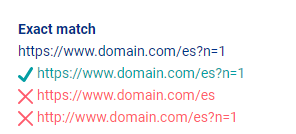
Exact match
You can use exact matches to track a specific URL. The data in the heatmap will contain only data collected from the exact URL.
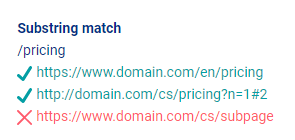
Substring match
You can use substring matches to capture only data from a specific component of the URL. This can be helpful when creating heatmaps from /pricing pages in various languages.
Creating filters
You can add filters to your heatmaps to make your data more precise.
To add filters to heatmaps:
- Click Add filter
- Choose the filter you want.
- Set up the filter and click Apply.
You can add as many filters as you want to your heatmap.
Updated 10 months ago